Dicevaders Doomed World Modifier Tips: Master the Challenge
Struggling with the Dicevaders Doomed World modifier? Discover expert tips, strategic unit management, and loadout advice to conquer this brutal challenge.
Published: Dicevaders Wiki Editorial Team
Table of Contents
Conquering the toughest challenges in Dicevaders requires more than just luck; it demands a deep understanding of your engine-building potential. Many players find themselves hitting a wall with the Dicevaders doomed world modifier tips they seek, specifically when dealing with the high-pressure unit-death spawn mechanics.
Understanding how to navigate this specific difficulty spike is essential for any commander aiming for the true ending. In this guide, we break down why this modifier feels so punishing and how you can pivot your strategy to turn a potential defeat into a tactical masterclass.
Understanding the Doomed World Modifier Mechanics
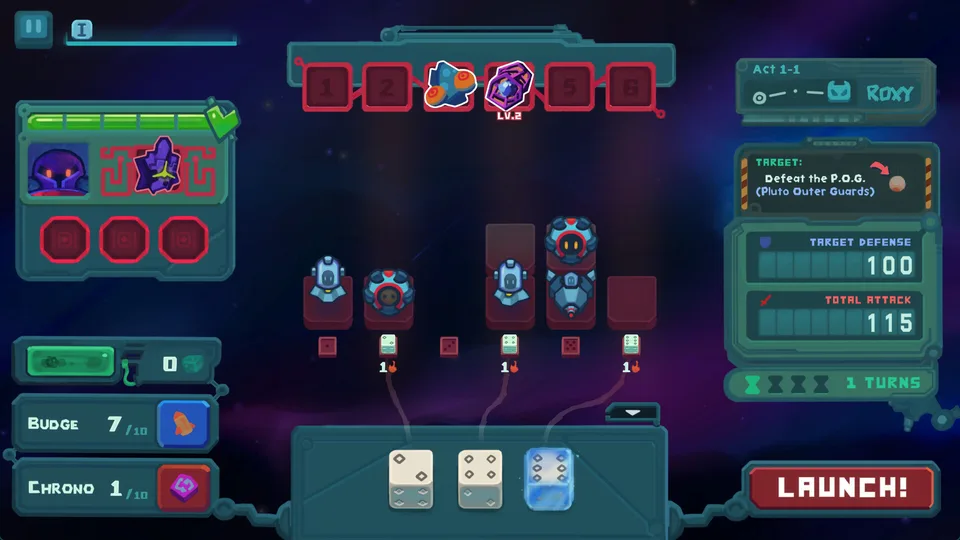
The Doomed World modifier is one of the most notorious hurdles in the game. According to community reports, the core frustration stems from the automatic unit-death trigger that occurs after every pilot interaction, immediately followed by the spawning of three Migos. This cycle creates a vacuum in your board state that can leave you vulnerable if you haven't prepared your synergies correctly.
To survive, you must stop viewing your units as permanent fixtures. Instead, treat them as disposable components of a larger, high-speed engine. The key is maximizing your output before the inevitable reset occurs.
Mechanic
Impact on Gameplay
Strategic Counter
Unit Death Trigger
Clears board after pilot
Focus on "On-Death" effects
Migo Spawning
Adds board clutter
Prioritize area-of-effect damage
Resource Reset
Limits long-term scaling
Build for rapid burst damage
Why Strategic Pivoting is Your Best Defense
One of the most valuable Dicevaders doomed world modifier tips shared by veteran players is the necessity of pivoting. Unlike other roguelikes where you might commit to a single "mayonnaise" build, Dicevaders rewards players who can adjust their artifact and unit composition based on the current shop rarity and board state.
When facing the Doomed World, you cannot rely on a single static setup. If your current artifacts aren't scaling fast enough to clear the Migos spawned by the modifier, you must be willing to swap them out. Look for artifacts that trigger upon unit death or those that provide immediate board control, as these offer the highest value in this specific challenge.
Tip
Adaptive Building
Do not marry yourself to a specific unit early on. In the Doomed World modifier, flexibility is your greatest asset. If a shop offers a high-rarity artifact that benefits from unit loss, take it, even if it disrupts your current synergy.
Optimizing Your Commander Loadout
Your choice of commander significantly impacts how you handle the Doomed World. Some commanders, like The Core, offer better base dice management, which is crucial when your units are constantly being wiped.
Recommended Commander Traits for Challenges
The Core: Excellent for consistent dice generation; helps recover tempo after a board wipe.
The Overseer: Allows for merging playstyles, enabling you to grab the best "On-Death" triggers from multiple pools.
Blob Girl: High-risk, high-reward; her ability to use mini dice can provide the extra damage needed to clear Migos efficiently.
By aligning your commander’s unique starting artifact with the requirements of the Doomed World, you effectively shorten the time-to-kill for the spawning enemies, preventing them from overwhelming your board.
Essential Tactics for Managing Migo Spawns
When the Migos spawn, they often clog up your columns, preventing you from placing high-value units. The most effective way to deal with this is to ensure your "Attack" score is generated early in the turn.
According to official game updates, managing your attack quota is vital for accessing higher shop rarities. By skipping turns or focusing on rapid-fire combos, you can manipulate the shop to find the "cursed ghost" or other respawn-focused artifacts that make this modifier much more manageable.
Priority List for Doomed World Runs
Early Game: Focus on base dice quantity to ensure you hit attack thresholds.
Mid Game: Pivot toward artifacts that scale with unit deaths.
Late Game: Prioritize board-clearing synergies to handle the Migo swarms.
Common Mistakes to Avoid
Many players fail this challenge because they try to force a traditional "scaling" build. In a normal run, you might want to build up power over 30 rounds. In the Doomed World, you simply don't have that luxury.
Hoarding Units: Don't hold onto low-value units. If they are going to die anyway, make sure they have done their job (e.g., providing a buff or generating currency) before they are cleared.
Ignoring Shop Rarity: Skipping turns to increase shop rarity is a mechanic many beginners overlook. Use this to find the rare artifacts that turn the tide.
Over-relying on Passive Perks: Some perks require long-term setup. In this modifier, favor active, trigger-based perks.
Common Mistake
Consequence
How to Fix
Static Builds
Lack of burst damage
Rotate artifacts every Act
Ignoring Migos
Board obstruction
Build for AOE/Trigger damage
Slow Scaling
Time-out losses
Focus on base dice efficiency
FAQ: Mastering the Doomed World Modifier
Q: Is there a specific unit that counters the Migo spawn?
A: Units that trigger effects on death are essential. Look for artifacts that gain XP when a unit is scored, as this helps you maintain momentum even after your board is wiped.
Q: How do I beat the "cursed ghost" respawn issue?
A: The cursed ghost is a powerful tool. Try to pair it with artifacts that benefit from the unit returning to play. This creates a loop that negates the negative impact of the modifier.
Q: Do these tips work for the Ultimate Earth challenge as well?
A: Yes. Many of the mechanics, such as managing shop rarity and pivoting your build, are universal across the harder multiverse challenges in Dicevaders.
Q: How many turns should I aim for to clear the boss?
A: Aim for a high-burst strategy. If you aren't clearing the board within 3-4 turns, you are likely falling behind the scaling curve required by the Doomed World modifier.